Sewing a Rilla Corset 1913-1921
On my latest splurge at Wearing History patterns I took the opportunity to order the Rilla Corset by Scroop Patterns. A print-at-home kit is available directly from Scroop, but if you're lazy like me, you can get a printed copy from Wearing History. I chose View A - the website itself describes the pattern perfectly.
With extensive instructions and advice on fitting, the Rilla was designed to be an easy make for sewers with some corsetmaking experience, or a good introduction to corsetmaking for the moderately advanced sewer with no previous corsetmaking experience.
This was my first foray into corset making, and even my first time using boning, so there was a lot to learn. Fortunately the instructions are so detailed, and the illustrations so helpful, it was hard to go wrong! Of course, I still managed to make mistakes, which I'll outline below.
Mistake Number One - Fabric
I ordered my fabric online after a bit of research. Cotton duck normally has no stretch and is relatively heavyweight so I thought I was safe - not so! While the fabric I bought was very beautiful, it had a little bit of stretch on the straight grain. I'm sure this will come back to bite me after wearing the corset for a while.
 |
| But look how pretty! |
Mistake Number Two - Supplies
Now this one I'm not that mad about - I had never made a corset before, so I had no idea how the supplies I was getting worked with the final product. The pattern has an extensive list and after writing down all the things you need it's pretty straightforward to order them. I got all my hardware from Sew Curvy - they are amazing, and I highly recommend them!
The first thing I did wrong was buy boning channels of a width to suit the bones I bought, instead of what the pattern required. It's one of those moments where your brain takes over and tells you it knows what it's doing; but it really doesn't. The bones for this corset (and probably a lot of other corsets) are worked as two bones lying next to each other per seam. So I ended up buying channels that were too thin, and of course not nearly enough to just double it up on each seam. I didn't discover this until I went to put the bones in, of course. Lesson learned!
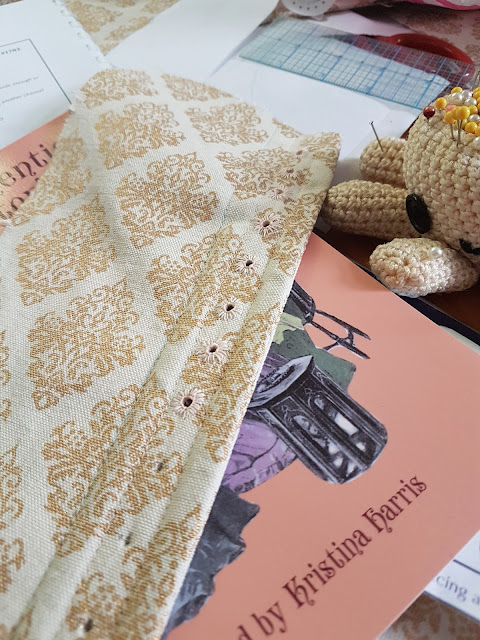
The second thing I regret is not buying lacing grommets or aiglets. I ended up hand-stitching all those eyelets, and since my awl is quite pitiful, the lacing had to be forced through the too-small holes. At least they look nice!
Mistake Number Three - Boning Channels
Since I didn't have usable pre-made boning channels, I followed the guide for making my own out of self-fabric. It came out so pretty that I'd do this again in a heartbeat, but once more I failed to follow directions.
It clearly says to form channels that end up as 7/8 inches - foolishly I used a bias binding maker that is marked as 3/4 inches. Why? I have no idea. Of course it wouldn't work. The channels ended up barely big enough for the bones, and the top-stitching on the outside didn't catch the channel edges. I had to hand whip-stitch all those channels down.
Despite these and other undocumented stuff-ups, I actually managed to create something I'm really proud of. I'd make another in a heartbeat, with the right boning channels and actual lacing grommets. I'd use actual coutil next time, sew much closer to the busk, and be a little neater sewing the cotton tape along the top and bottom. The only adjustment I made was to bring in a seam at the top - looking at the finished product with the boning in, I don't think I needed to do that at all.
 |
| Hand-worked eyelets |
 |
| Pattern matching |
I'm so glad I managed to get this done with time to spare for making the clothes that go over it. I've finished a blouse that I will write about soon; I'm yet to start a 1917's suit that I want to at least half finish before Napier Art Deco (which is in just over a week - yikes!).


Comments
Post a Comment