Vintage 1940s Blouse Pattern - Simplicity 4864
One of my long term goals is to make a wardrobe full of home sewn and vintage / second hand garments. I've stopped buying new clothes (apart from underthings) and I'm looking to sell on or donate my old "new" clothes. Instead of throwing it all in a generic clothing bin, I'm looking for new ways to donate. One is to drop them off at the Rainbow Youth Community Wardrobe, which provides free clothes for queer and gender diverse people to help them affirm their identity.
While it's all well and good to make tonnes of pretty dresses (nothing wrong with that, of course) it certainly helps to have a wardrobe full of separates too. I don't have too many separates patterns, and only a few vintage ones.
For this project I'm using a 1940's Simplicity pattern, number 4864. If you google that, you will get clown costumes, so I don't recommend trying to find it. I bought this one in an Instagram sale from shopfrolickingfrocks. Thanks to Etsy fees, you will probably find patterns for a lot cheaper on Instagram, though of course the platform isn't made for selling so it's a little hard to search for them.
I'll be using variation 4, the scallop detail version. It is absolutely darling! For the fabric, I have prewashed this length of vintage cotton gingham. This photo is a little washed out - the true colour is a very vibrant marigold with peach contrast. I'm pairing it with these vintage Boutons pour Lingerie (giggle). Let's take a moment to appreciate all of the variations in this blouse. It's the perfect pattern!
I made a mockup with the tissue pattern, then marked down the adjustments I needed to make. The blouse was much too baggy in the sides, but perfect over the hips. After taking an inch out of the side seams, I needed to make an adjustment to the sleeve pattern. This just involved "lowering" the sleeve cap (I totally did this by eye, don't tell anyone). At this stage I copied all the pattern pieces with adjustments to paper, as the tissue looked ready to fall apart the next time I pinned it.
In the photo above you can see that this pattern is both perforated and printed on. Instructions and information about the pattern piece are available, but you might also notice the triangles that number the notches. This is a pretty handy little way for the instructions to tell you which part goes where. I found it a lot clearer to follow "Match notches 5" than "Join seams at double notches". This is the first time I have seen a numbering system like this.
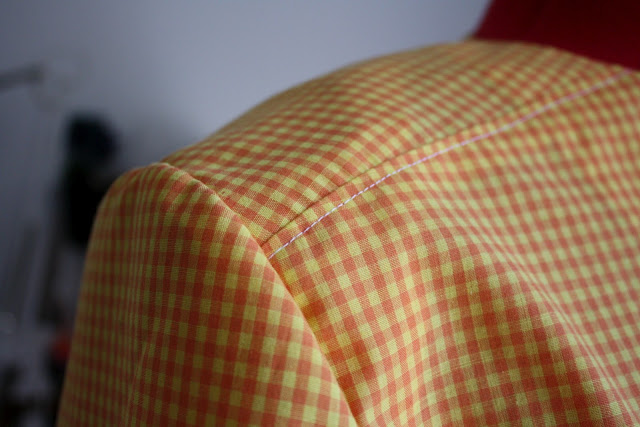
After cutting all the pieces out (this pattern does not use any interfacing), it was time to make the darts and tucks. Pictured above are the tucks, which a pressed flat to form an inverted box pleat. The front features curved, upside-down darts, that are also pressed open. That's two new things I've already learned from this pattern! The blouse is joined at the shoulders and top-stitched down. Since the side-seams have a 3/4" seam allowance (meant for ease of alterations) I decided to finish those as french seams. I plan on throwing this blouse in the wash so it needs to be durable inside and out.
The scalloped facing was one of the trickier parts. I'm not great at sewing a straight line at the best of times, so sewing a number of even curves was fairly daunting. I got through it in the end, making sure to make a small horizontal stitch at the point of each scallop. I'm not sure where I read this tip, but when you turn the piece after clipping it, the points are much less likely to pucker.
Now it was time for the sleeves and shoulder pads. I hadn't actually tested the new sleeve pattern, but I was kind of sure it would work. Thankfully it did, with a little adjusting of where the top of the cap should sit. I made the shoulder pads from a 6" square of batting sandwiched between calico, then tacked together and covered according to the instructions. Pictured here you'll see the shoulder pad after I put it in the first time. After trying it on, I found it was sitting very oddly. It occurred to me that in all my other vintage garments, the shoulder pads are attached with swing tacks, allowing the shoulder pad to shift and settle slightly as you move. After swapping the "static" tacks for chain stitches, I was much more pleased with the way it was sitting.
Now for the dreaded buttonholes. The buttonhole function on my sewing machine is completely broken. I think a gear must have slipped out of place because it just does not work. That means hand-worked buttonholes for all of my garments! The buttonholes are started with a line of stitching around the marking. The line is slashed right down the centre, and the buttonhole stitch is worked around the edge. I used two strands of embroidery floss for this.
And with that, the blouse is complete! There isn't a lot I would change about the fit, but I might move the pocket over half an inch so it doesn't look like it's being swallowed by my armpit. There is a lot of room for detailing. I can imagine delicate embroidery details, bold piping, rick-rack, stitching detail. I'm looking forward to making a few more of these. The fit is very flattering and would work well tucked in to a skirt or loose over trousers.
 |
| Top-stitching detail on the shoulder seam |
 |
| Messy hand-worked buttonholes |


Comments
Post a Comment